

Let’s celebrate Pi Day! Whether you’re reading this in March around Pi (pie) Day, or any other time, blueberry pie bars are always a good idea.
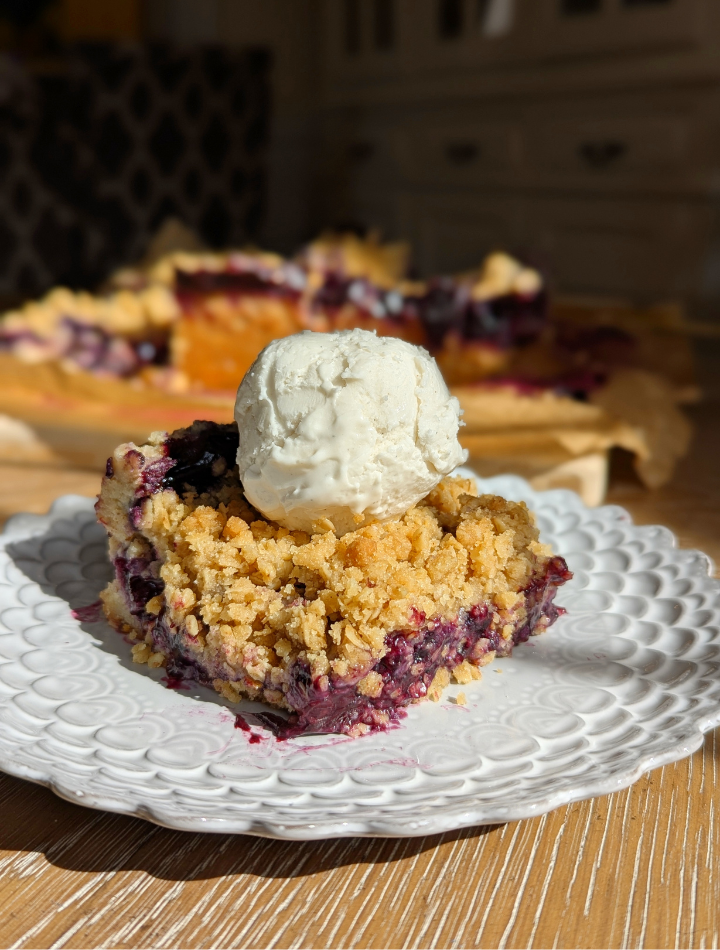
Fresh blueberries are layered atop a butter shortbread crust, all topped with a brown sugar cinnamon crumble topping. No one would ever guess they’re vegan, gluten-free, dairy-free, and egg-free.
The beauty of bars
It’s no secret—I love bars. Cookie bars, brownies, blondies, and pie bars! I love bars for several reasons. I love how easy they are to share. How they can be sliced and taken anywhere you want to go. I like that they are versatile and can be made in tons of flavors. They can be cut into whatever size you want, whether you’re after big squares or bite-sized morsels. And, they’re easier! They really are. If pie crust has ever frustrated you, there’s none of that here. There are 3 main steps to this recipe and it comes together super quickly. So if you feel busy, like I do, and could always use more time in the day, bars are really a life hack.
Why weighing ingredients is a baking game-changer
Measuring by weight is a game-changer—it’s the easiest way to bake consistent, delicious results. A cup of flour can vary depending on how it’s scooped, but 120 grams? Always the same. Plus, it cuts down on dishes! But don’t worry, I’ve included cup measurements too, so you can bake however you feel most comfortable.


How to enjoy your Blueberry Pie Bars
- On a dessert spread: Add them to your dessert table.
- As a gift: Pack them in decorative tins or bakery boxes with a red ribbon.
- For an indulgent treat: Enjoy warm with a scoop of dairy-free vanilla ice cream.
Tips for the best Blueberry Pie Bars
- Par-bake the crust: This step helps it hold up against the juicy blueberry filling without getting soggy.
- Cook the blueberries just until thickened: Simmer the filling until it coats the back of a spoon.
- Chill before slicing: For the cleanest cuts, let the bars cool completely (or even refrigerate for an hour) before slicing.
- Use fresh or frozen berries: If using frozen blueberries, don’t thaw them first; just add a few extra minutes to the cooking time.
Baking tools I recommend
Here’s a quick rundown of the key tools that I use to make this recipe:
- 9×9 inch baking pan: I like this one because it comes with a lid. You can also use an 8×8 inch baking pan.
- Parchment paper: A must for easy removal from the pan and mess-free slicing.
- Silicone spatula: Great for mixing and spreading.
- Kitchen scale: For precision and fewer dishes.
- Cute gift boxes: Turn your treats into thoughtful gifts.
The best vegan and gluten-free ingredients
Want a quick resource with what vegan and gluten-free ingredients to use? I put together this free guide with all my favorites — the ones I use every day. Once you have the essentials, you can bake anything that you (or those around you) are craving.
Note: Some links in this post are affiliate links, meaning I may earn a small commission if you make a purchase, at no additional cost to you, and helps support my small business.
Let’s bake! How to make Blueberry Pie Bars

Blueberry Pie Bars | Vegan, Gluten-Free, Dairy-Free, Egg-Free
Description
Everything you love about pie in a fun shareable bar form! Buttery shortbread crust with a jammy blueberry filling and crumble topping. No one would guess they're vegan, gluten-free, dairy-free, and egg-free.
Ingredients
Shortbread Crust
Blueberry Filling
Crumble Topping
Instructions
-
Prep: Preheat your oven to 350°F and position the rack in the middle. Line a 9×9 inch baking pan with parchment paper, leaving an inch overhang on the sides for easy removal after baking. Set aside.
The Crumble Topping
-
In a medium-sized bowl, mix together the crumble topping ingredients: flour, oats, brown sugar, melted butter, and dash of cinnamon. Mix the ingredients together with a silicon spatula. You’ll have a crumbly topping (like the topping of a crumb pie). Cover this bowl and pop it in the fridge.
The Shortbread Crust
-
Make flax egg: In a small bowl, use a fork to mix together the ground flaxseeds, water, and vanilla. Set aside to thicken.
-
Whisk together dry ingredients: In a medium-sized bowl, whisk together flour, baking powder, and salt. Set aside.
-
Cream together the wet ingredients: In the bowl of your stand mixer, measure together the butter, granulated sugar, and brown sugar. Beat on medium-high speed until it’s light and fluffy, 3-4 minutes.
-
Slowly pour in the flaxseed-water-vanilla mixture and beat again on a medium speed to incorporate the flaxseeds evenly into the batter, about 2 minutes. Use a rubber spatula to scrape down the sides, as needed.
-
Add the dry ingredients: With the mixer on its lowest speed, gradually add the flour mixture. Stop to scrape down the sides of the bowl with a spatula as needed. Mix until the dry ingredients are just combined, avoid over-mixing to keep the bars soft and tender.
-
Spread the dough into your prepared baking pan, using a silicone spatula to spread it evenly.
-
Bake the crust in the oven for 10 minutes.
-
In the meantime, while the crust bakes, make the blueberry filling.
The Blueberry Filling
-
Put the filling ingredients into a medium-sized sauce pan: blueberries, sugar, cornstarch and lemon zest. Heat until it starts to simmer, stirring constantly so the sugar doesn't burn to the bottom. Continue to simmer and stir for 8-10 minutes. It'll thicken.
Assemble
-
Once the crust is finished baking after 10 minutes, remove it from the oven onto a hot pad or wire cooling rack. Pour on the blueberry filling mixture and spread evenly. Then take the crumble topping out of the fridge and sprinkle it all over to create the topping.
-
Set the baking pan on a foil-lined baking sheet before placing it in the oven. This catches any juicy blueberry drips, saving your oven from a sticky mess.
-
Bake for about 45 minutes, until the topping is light brown and the blueberries are bubbling.
-
Remove from the oven and allow to cool on a cooling rack or hot pad. If you'd like to enjoy them warm, wait about 10 minutes, then slice and serve! I recommend with vanilla ice cream (Oatly is my favorite).
-
If you aren't eating them right away, let the bars cool completely before covering and refrigerating. This helps the layers set for clean slices.
-
They’ll be good for about one week in the fridge, or 3 months in the freezer.
-
Happy Pi Day (or just happy baking)! Enjoy!
Note
I include both the volume (cups) and weight (grams/ounce) measurements in the recipe. I highly recommend baking by weight (e.g. 120 grams per cup of flour, rather than 1 cup of flour). It’s more accurate, consistent, and results in fewer dishes! That said, baking by volume is also wonderful. Do whatever is most convenient for you.
I mention hot pads and wire cooling racks, so here are links to both if you’re in need.
If you’re looking for a 9×9 inch baking pan, I recommend this ceramic one or this glass one with a lid.
Gluten-free option: For gluten-free, I use + recommend King Arthur measure-for-measure gluten-free flour.
For vegan butter, I use + recommend soy-free Earth Balance sticks, Country Crock plant butter sticks, or Violife plant butter.