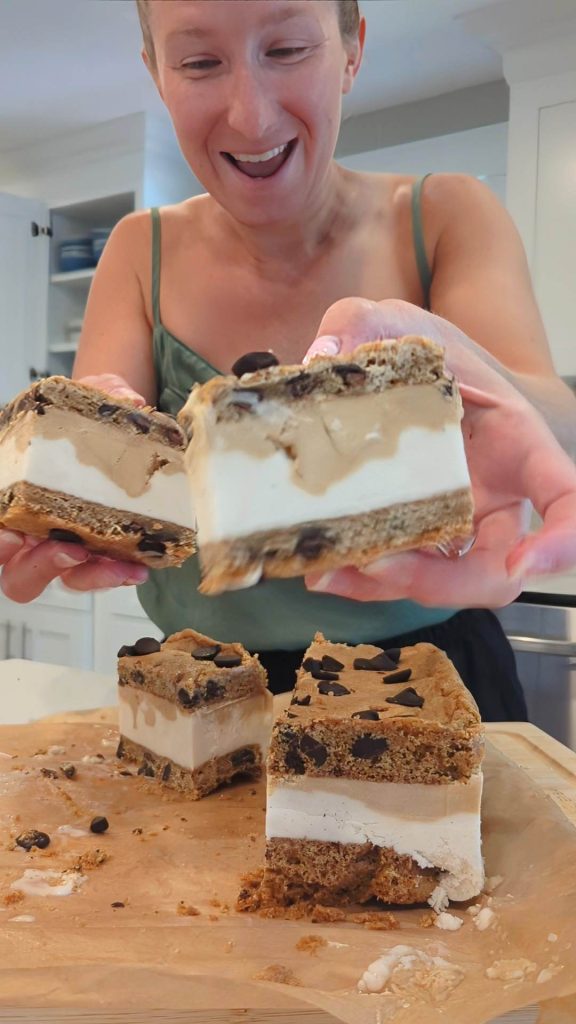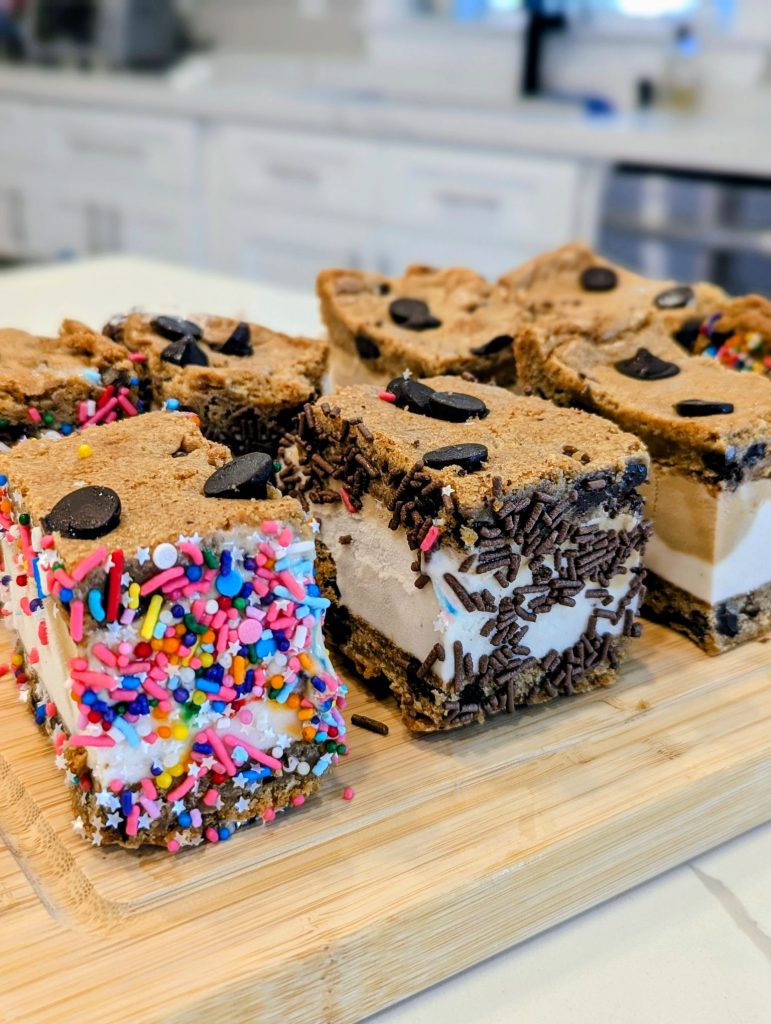

Chocolate Chip Cookie Bar Ice Cream Sandwiches are a classic! When I was a kid, two of my favorite desserts were (1) the traditional ice cream sandwiches with vanilla ice cream between chocolate cake-like layers, and (2) the Chipwich chocolate chip cookie vanilla ice cream sandwich from the ice cream truck.
Today, we’re taking inspiration from both to create the ultimate summertime dessert: Chocolate Chip Cookie Bar Ice Cream Sandwiches!
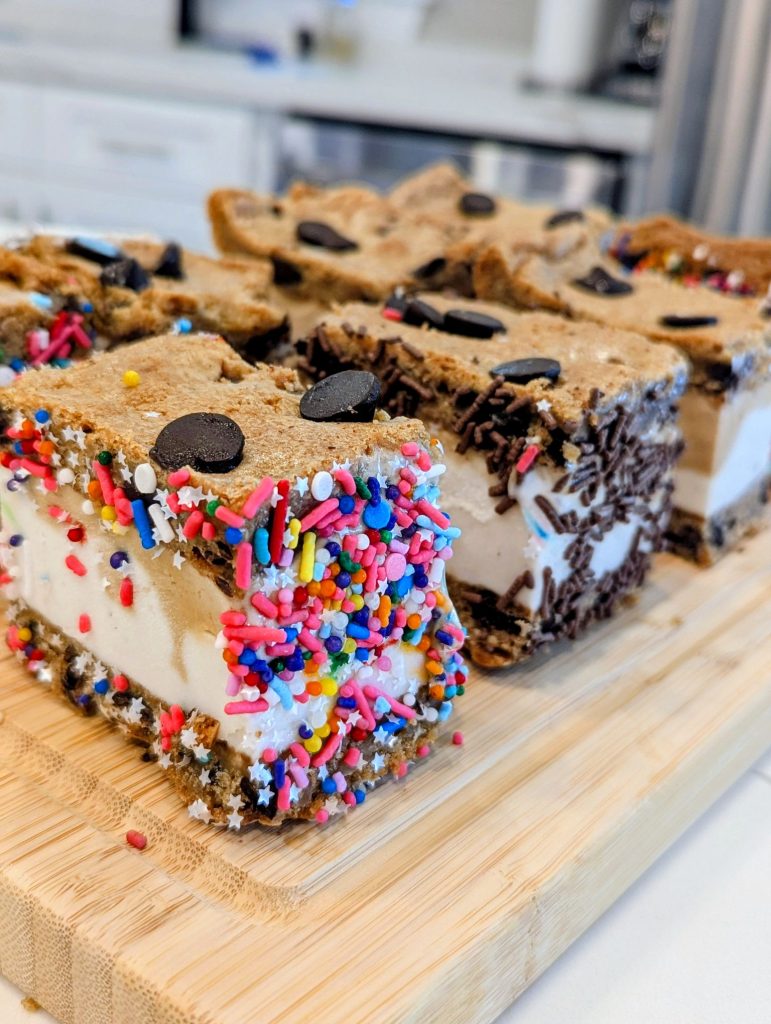
A thick layer of cool, creamy ice cream sandwiches between soft chocolate chip cookie bars, and all rolled in sprinkles. What’s not to love?!
Use your favorite ice cream. Choose one flavor, two, or even three (Neapolitan cookie sandwiches sound pretty incredible tbh).
You can use mini chocolate chips or regular-sized. Rainbow sprinkles, chocolate jimmies, or any sprinkles that make you happy. My favorites come from Sweetapolita. They have hundreds of gorgeous sprinkle options. They taste delicious. And dozens are vegan and gluten-free, too. (You can use the code FetchingGoodies for 15% off if you want to treat yourself to something colorful and happy.)
Subs, swaps, FAQ
- Dairy-free: Make the recipe as written.
- Vegan or egg-free: Swap in flax eggs for the regular eggs (see notes section of recipe card below). Also double check your plant butter, chocolate chips, and sugar: most conventional granulated and brown sugar in the US is refined using bone char from cattle bones as a decolorizing filter, so it isn’t strictly vegan unless it’s labeled organic or vegan-certified.
- Gluten-free: Swap in King Arthur Measure for Measure Gluten-Free Flour for the all-purpose flour, and use gluten-free oats.
- Can I add nuts or swap in different mix-ins? Yes, walnuts, pecans, or dried fruit all work in place of some or all of the chocolate chips, keep the total mix-in amount close to 1 cup.
- Can I use two 8×8 inch pans instead of the 13×9 inch pan? Yes, you can. The bars will come out a bit thinner, so check them for doneness in the oven after 12 minutes instead of 15.
The beauty of cookie bars
I love cookies. Cookie Bars are cookies, but in square form, and even easier to make. They skip the scooping and shaping: just press the dough into a pan, bake, and slice. Whether you’re after big, chewy squares or bite-sized morsels, these bars are as versatile as they are delightful. If you’re busy and feel like you could use more time, cookie bars are a true life hack.
Baking tools & equipment I use for Chocolate Chip Cookie Bar Ice Cream Sandwiches
- Kitchen scale: I bake everything by weight for accuracy and fewer dishes using this scale.
- 13×9 inch baking pan: The pan that gets the most use in my kitchen. This is the one I use (comes with a lid!).
- Parchment paper: Line the pan and leave an inch of overhang on the sides. Makes cleanup a breeze and you can lift the bars out of the pan easily. My favorite.
- Rubber spatula: For scraping the bowl clean and spreading the dough evenly in the pan. My favorite.
- Wire cooling rack: Lets air circulate underneath the pan so the bars cool evenly and completely. The one I use, great for when you bake multiple things or have more than 1 pan to cool at the same time.
Want a quick resource with what vegan and gluten-free ingredients to use? I put together this free guide with all my favorites, the ones I use every day. Once you have the essentials, you can bake anything that you (or those around you) are craving.
Note: Some links in this post are affiliate links, meaning I may earn a small commission if you make a purchase, at no additional cost to you, which helps support my small business.
More cookie bar recipes



Chocolate Chip Cookie Bar Ice Cream Sandwiches | Dairy-Free with Vegan & Gluten-Free Options
Description
Nothing says summer quite like ice cream sandwiches, and these chocolate chip cookie bar ice cream sandwiches make them easier and tastier than ever! Creamy ice cream is sandwiched between two soft chocolate chip cookie bars and rolled in sprinkles for a dessert both kids and adults will love. The recipe is dairy-free as written with swaps for vegan and gluten-free in the notes.
Ingredients
Instructions
-
Preheat your oven to 325 degrees F.
-
In a large bowl, mix together the melted butter, granulated sugar, and brown sugar.
-
Once fully combined, add in the egg, egg yolk, and vanilla extract (or vanilla bean paste). Mix again.
-
Add in the dry ingredients: flour, baking soda, salt, and cornstarch. Slowly mix them together, then continue mixing to fold them into the wet ingredients. You should end up with a smooth cookie dough.
-
Gently stir in the chocolate chips, making sure not to over-mix.
-
Spread the dough into a parchment-lined 13x9 inch baking pan. Spread into a thin even layer.
-
Bake in the preheated oven for about 15 minutes, or until the edges are golden brown and the middle is set.
-
When they're done, remove from the oven and top with a few more chocolate chips to add that extra fetching look.
-
Allow the pan to cool completely. Then pop it in the freezer for about 30 minutes to firm up the bars. This will make them easier to cut cleanly.
-
Allow the ice cream to sit out at room temperature for about 20 minutes to soften slightly.
-
Now, using the parchment paper overhang, lift the bars out of the pan and onto a cutting board. Cut in half short-ways with a sharp knife.
-
Line the baking pan with a fresh piece of parchment paper. Flip one of the pieces of cookie bar upside down and place it in the pan, pushed up to the edges. Then, top with your ice cream of choice. Spread the ice cream out smoothly. Then top with the remaining cookie bar slab. Press the bars gently into the ice cream to meld them together.
-
Fold the parchment paper over the ice cream bars. Cover the pan and place it in the freezer for at least 5-6 hours, or overnight.
-
Once the bars are fully chilled, remove them from the baking pan using the parchment paper overhang. Trim off the edges (save these and eat them at your leisure). Cut the bars in half lengthwise, so you have two halves. Cut each of those halves into 4 rectangles, so you end up with 8 ice cream sandwiches.
-
Pour the sprinkles of your choice onto a shallow plate. Rub the sides of the bars in the sprinkles until fully coated. Repeat as desired.
-
Serve immediately, or wrap each ice cream sandwich in parchment paper and store in the freezer until you'd like them. They can be stored in the freezer for up to 6 months.
-
Enjoy this delicious cookie ice cream treat!
Note
- I include both the volume (cups) and weight (grams/ounce) measurements in the recipe. I highly recommend baking by weight (e.g. 198 grams per cup of sugar, rather than 1 cup of sugar). It’s more accurate, consistent, and results in fewer dishes! That said, baking by volume is also fine. Do whatever is most convenient for you.
- For plant butter, I use Earth Balance and Country Crock brands.
- For chocolate chips: Trader Joe's has delicious dairy-free chocolate chips. I also often use Wegmans brand for vegan, dairy-free, gluten-free. There are other brands too, check labels.
- For gluten-free, swap in King Arthur Measure-for-Measure Gluten-Free flour.
- For vegan, swap 1.5 flax eggs for the regular eggs. 1 flax egg is 7 g of ground flaxseeds mixed with 45 g of water. For 1.5 flax eggs, mix together 10-11 g of ground flaxseeds with 67.5 g water. Allow to sit for 10 minutes before using.
- I order my sprinkles online from Sweetapolita. You can use the code FetchingGoodies for 15% sitewide. There are SO many playful colors. Have fun!